How to Save Heirloom Tomato Seeds
Seeds after drying will be very hard.
When Mission Hills Garden Club met in September, Brijette Romstadt gave us a talk on seeds. Of all the seeds she mentioned, tomatoes interested me most. With the exception of 1972 or 1973, I have found it much cheaper to purchase fancy heirloom tomatoes than to grow them. Nevertheless, despite my vow to never grow another tomato ever, I find myself saving the seeds as Romstadt instructed. This year I am trying to follow her instructions to the letter.
The first step is to choose the tomato or tomatoes you want to duplicate. Unfortunately, my labels fell off or were pulled off so I have no idea which seeds went with which tomato. I can say that my seeds were all tomatoes I liked (maybe 20 or so. Not more than 30 for certain). If they cross-pollinate. I don’t care. In this step, you definitely want to use a ripe tomato.
Romstadt has learned that in coastal areas (Mission Hills gets coastal breezes and some of its fog) cherry tomatoes do better than the big beefsteaks. I was successful the one year in the early 70s with huge beefsteak tomatoes. I have no idea of their name, but I harvested about 20 or more a day. Romstadt says that was very unusual, and I certainly haven’t grown anything larger than a big plum tomato since.
Cut the tomato in half (I read somewhere to cut the tomato at the equator.) Using your fingers or a melon scoop, gently remove the seeds from each half, and place them in a container. Put in enough water to make a soupy consistency and stir. I sliced my tomato and dumped the seeds. Then I put the slices in a sandwich and ate them.
Cover the container. You may want to poke holes in it. I screwed the lid onto my container, and the seeds did what it said they would do. You probably should label the container with the kind of tomatoes you’re planning to get. As I said, I didn’t label mine, as I have no idea which tomatoes I took seeds from. Put the container in a warm place. I kept mine on the kitchen counter out of the sunlight.
It was warm (heat wave) and not breezy. Cooler areas mean a longer fermentation time, and that is what you want. Now the seeds need to ferment. Tomato seeds have a gelatinous covering that keep them from germinating.
Fermentation rids them of this covering. You may stir the seed liquid (remove the lid or cover first) and then put it back with its cover where it was before. Mine started to grow mold (the sign that fermentation has begun) very quickly. As it ferments, it will turn darker and may emit a smell. The seeds should have sunk to the bottom and there may be foamy white mold at the top. The mold will help dissolve the protective gel around the seeds, but it will not hurt the seeds. Do not leave the seeds in the fermentation too long as they may begin to sprout. You don’t want them warm and wet until you are ready to plant them. You can’t save sprouted seeds.
The next step is where I am at this exact moment. I removed the mold from the top of the water. I didn’t use my hands as the mold had turned dark and was most unappealing. I flipped it into the garbage disposal and then filled the container with water. I stirred it briefly. Pour off the liquid and bad seeds and any other debris that is on the top. I used a strainer for this step. Keep rinsing and draining the seeds until the water is clear and all the seeds are on the bottom of the container.
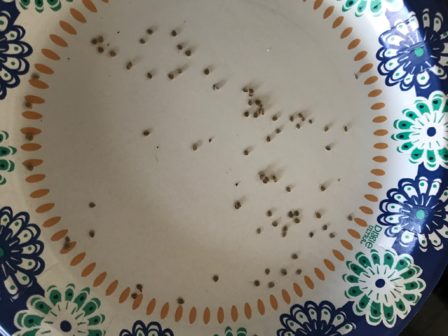
The seeds cannot be stored damp, so place them on a piece of waxed paper or parchment paper. Do not use ceramic, metal or plastic, as they won’t absorb water. Paper towel adheres to the seeds, so avoid that. Paper plates should work. At this point you might want to label these seeds too.
The seeds should be in a warm area that is not in direct sunlight. Stir them or shake the paper plate every day to prevent clumping. Air speeds the drying process. It should take a week or two or even three to dry. Do not dry them in the oven or heat them to dry. Humidity and high temperatures may cause the seeds to sprout.
You can tell when the seed is dry as it will be very hard. It snaps faintly when broken in half. If the seed bends, it needs to dry longer. Once all your seeds have dried, you can move on to the last step, storing.
Paper envelopes are perfect for storing seeds. Be certain your seeds are 100 percent dry, especially if you use plastic bags, which encourage mildew, which will spoil everything. Store the seeds in a cool, dry place. Some people store them in the refrigerator or freezer. Then hope for the best. If I get a tomato from my seeds, I’ll let you know.
Our next meeting will be held at Mission Hills Nursery – 1525 Fort Stockton Drive – from 6 to 8 p.m. on Wednesday, January 24, 2018. It is free for members; $10 for guests.
Category: Education, Local News